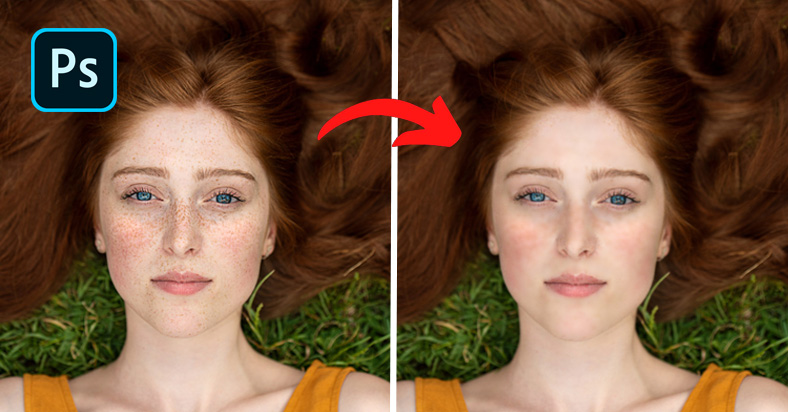
In the realm of digital aesthetics, achieving flawless skin in photographs is an art form, and Adobe Photoshop stands as the virtual canvas for perfection. If you’ve ever wondered how to effortlessly erase blemishes or freckles from your images, you’re in the right place. This step-by-step tutorial is your passport to the world of seamless skin retouching, guiding you through the process with simplicity and precision. Get ready to elevate your photo-editing game and unveil the secrets to radiant, flawless portraits.
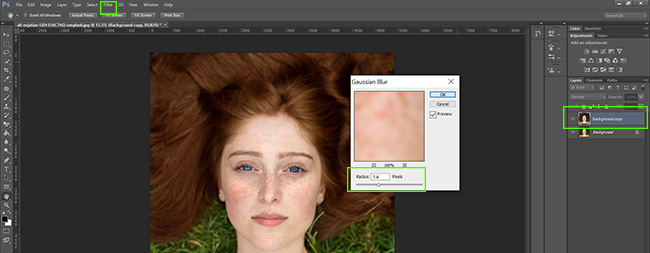
Step 1: Duplicate the layer. On the new layer, go to Filter and select Gaussian Blur and adjust it to 7.6px blur.
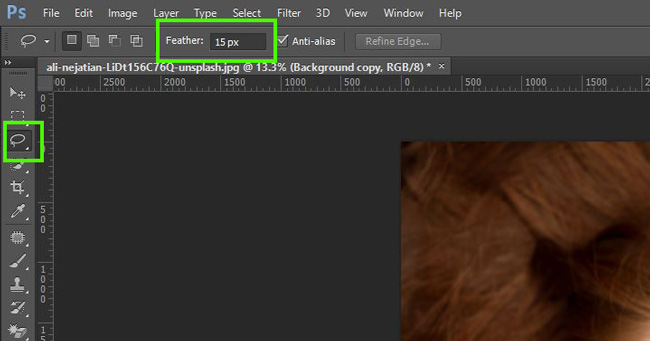
Step 2: Select The Lasso Tool and set Feather to 15px.
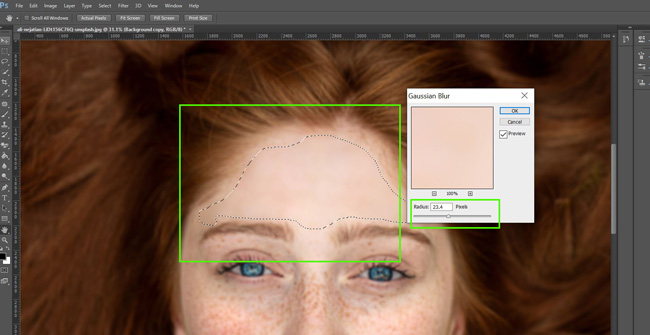
Step 3: Select an area on the image using the Lasso tool, go to Filter again and select Gaussian Blur, adjust the radius pixels to a point where the skin is smooth. Repeat same steps for other areas of the skin that needs to be cleaned.
That’s it. Do the editing well enough and you should be able to remove blemishes or freckles. But if you want to go the extra mile and make the image more crisp, follow the remaining steps below.
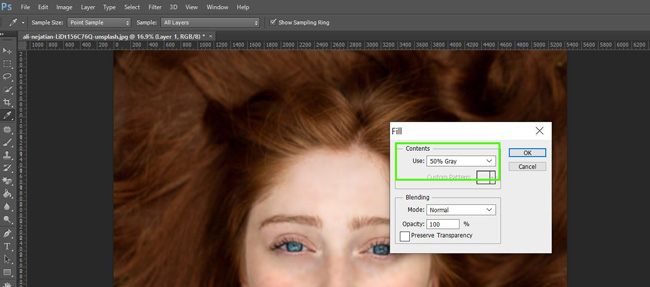
Step 4: Create a new Layer, Go to Edit then Fill. Set the Use to “50% Gray”.
Step 5: Go to Filter, select Noise then Add Noise. Put the amount to 15.84%.
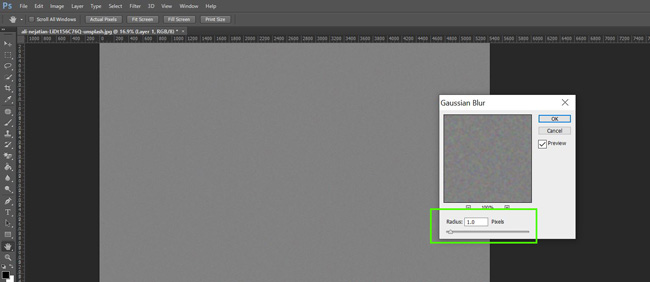
Step 6: Go to Filter, Blur and Gaussian Blur. Bring down the Radius to 1px.
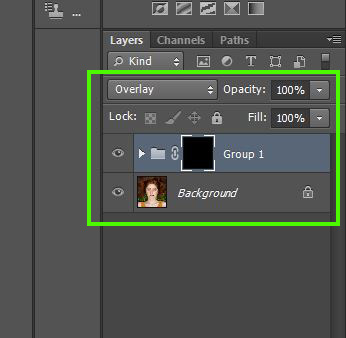
Step 7: Change the blend mode of the new layer to “Overlay”. Select both the new layer and duplicate layer and group them by pressing CTRL + G. Then add an inverted mask to it by pressing the ALT key + Add Layer Mask icon
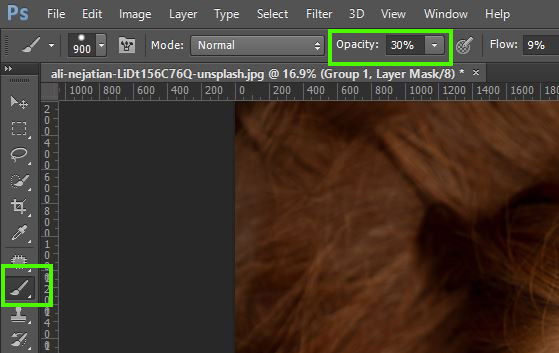
Step 8: Select the Brush Tool. and set the Opacity to 30%. Then brush on the skin to reveal smoothen skin.
Once done brushing, a better edited picture should now appear.

