In today’s fast-paced digital landscape, APIs (Application Programming Interfaces) play a crucial role in connecting and enabling the seamless exchange of data between different software applications. APIs serve as intermediaries, allowing applications to communicate and share information efficiently.
Imagine you have a spreadsheet filled with valuable data, and you want to make it accessible to various applications or services without delving into complex coding. This is where turning your CSV data files into an API can be incredibly beneficial. In this tutorial, we’ll guide you through the process using Xano, a platform that allows you to transform your CSV data into a functional API with minimal effort and no coding required.
Understanding APIs: Examples for Clarity
Before we delve into the steps of transforming CSV data into an API, let’s briefly explore what APIs do with some easy-to-understand examples:
Weather API:
Imagine you have a weather application on your smartphone. This app needs real-time weather information to provide accurate updates. Instead of developing its own weather prediction system, the app connects to a Weather API that supplies up-to-date weather data, ensuring that users receive accurate and current information.
Payment Gateway API:
When you make an online purchase, the payment process involves multiple steps. Payment Gateway APIs facilitate the secure transfer of payment information between the online store and the payment processor, ensuring a smooth and secure transaction.
Now, let’s move on to the steps for turning your CSV data files into an API using Xano.
Turning CSV Data Files Into an API with Xano: A Step-by-Step Guide
Step 1: Collect Your Data in a CSV File
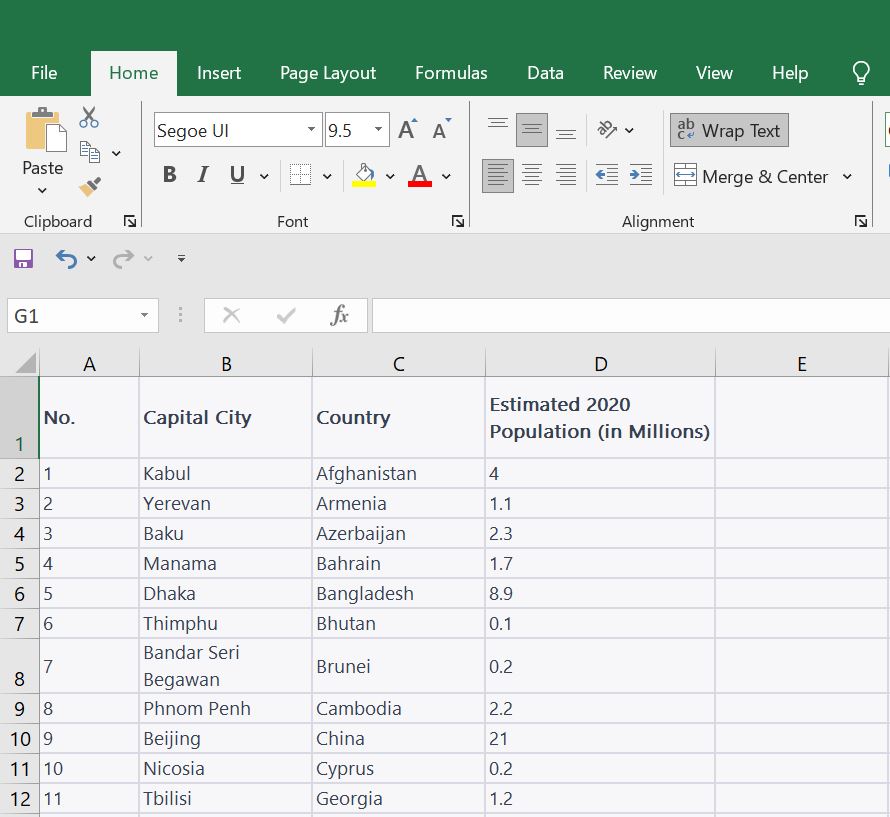
Begin by organizing your data in a CSV file. This could be any information you want to make accessible through the API, such as product details, user information, or any other dataset. In this sample, we’ll use the data of capital cities in Asia with their estimated population in 2020

Step 2: Create an account on Xano.com
- Navigate to Xano’s website and sign up for a free account.
- Once registered, log in to your Xano account and create a Workspace name. In our example, we named ours “Asian Capital Cities Population”
Step 3: Upload the CSV File to Xano
- In your Xano dashboard, Go to “Database” and “Add Table” and select Import to import your CSV Data file.
- Import your CSV data file.

Step 4: Define Endpoints for Your API
- In the Xano dashboard, go to API, click the “Add API Group” button and give the API group a name.
- Click “Add API Endpoint” and select “Start From Scratch” and give your endpoint name.

Step 5: Configure Your API
- In the Query Workflow for the Inputs section, you may specify your endpoint has any inputs or query parameters. Go to the “Help” if you find this part confusing.
- Add functions to determine how your endpoints gets processed, meaning which data will it be showing for that endpoint.
- Test the data by looking into the Response tab, if you’re sure that that’s the data you want to be shown, click on the “Publish” button. Go back to the API tab from the dashboard and copy the API link.
Step 6: Publish Your API
Once you’re satisfied with the setup and testing, deploy your API by following the deployment instructions provided by Xano. This makes your API accessible to external applications and services.
Congratulations! You’ve successfully turned your CSV data into a fully functional API using Xano, all without writing a single line of code. This approach allows you to quickly share and utilize your data across various platforms, making it a powerful solution for non-developers and small businesses.

