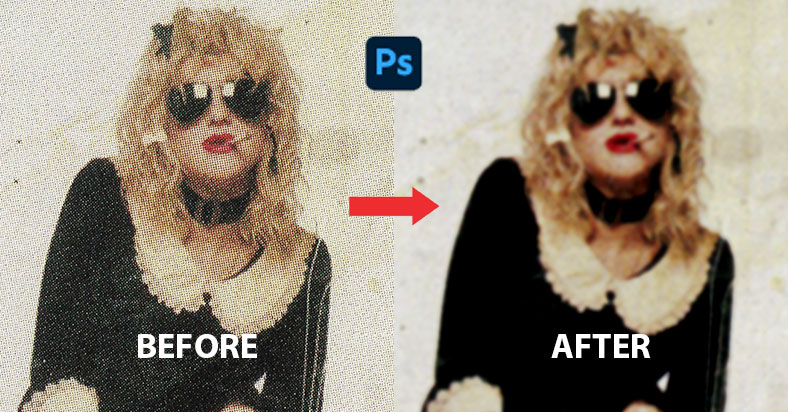
Scanned images from books, magazines, or newspapers will often have grainy dots on them. To remove those dots using Photoshop, you need to do it with the Gaussian Blur.
Here are the quick steps on how to do it:
- Up sample the image. Try resizing it to 200%
- Use Gaussian Blur to smear out the dots. Adjust it until you’re satisfied with results.
- Then use Unsharp Mask. Adjust settings again until image is clearer.
- Change the image size back back to original. Resize it to 50% if you’re up sampled it earlier to 200%.
- Add Soft Light filter to make image look sharper (optional)
Walkthrough to remove the grainy dots
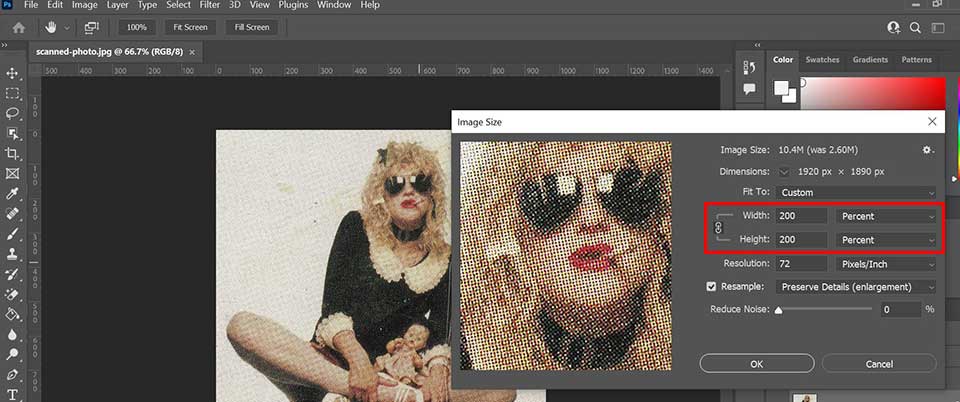
1.) Open the image that you want to edit. Up sample or resize the image to 200%. To do that, go to Image > Image Size. Change the dropdown option to “Percentage” and change to 200. The image will become bigger.
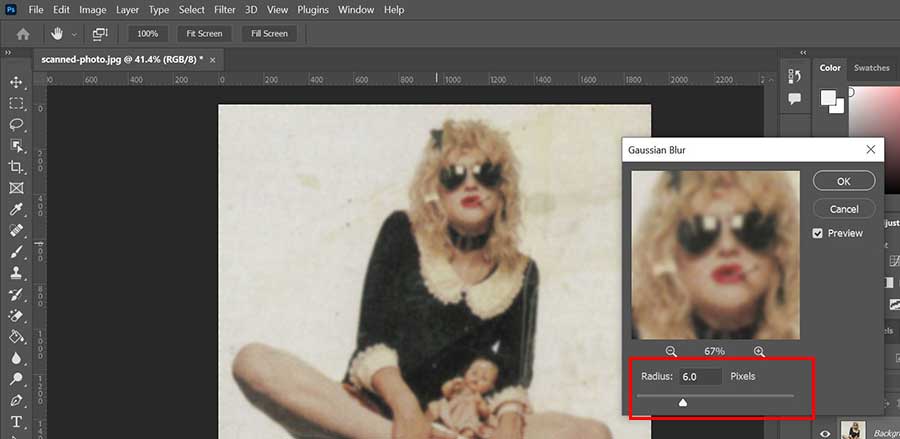
2.) Next, go to Filter > Blur > Gaussian Blur. Adjust the radius to add more or less blur to the image until the dots smear out. In this example we went for 6.0. The image will become a bit blurry since it’s a blur filter. But don’t worry, it’s just meant to smear out the grains.
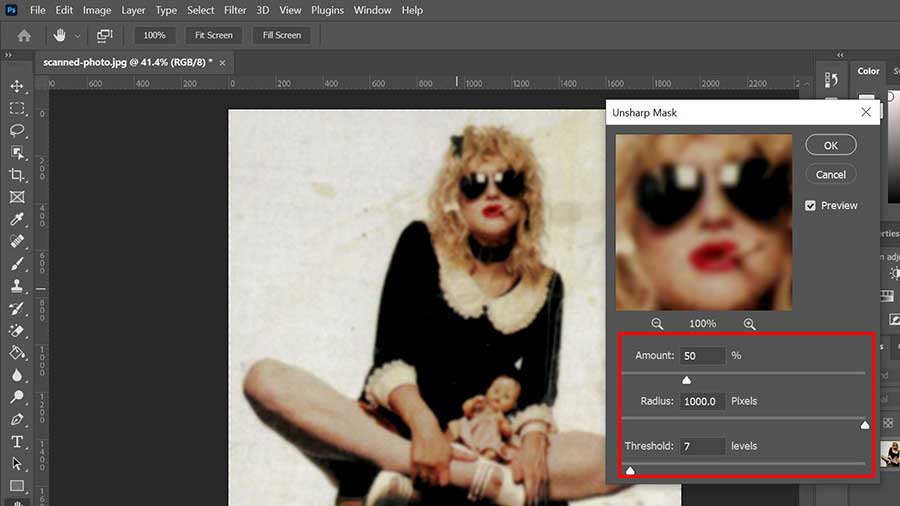
3.) You now need to go to Filter > Sharpen > Unsharp Mask. The image will become sharper when you adjust the three settings of Amount, Radius, and Threshold. Play around with the settings until it comes to its clearest.
4.) This step is optional, but can add extra sharpness to the picture if the above steps are not enough to make the image look better. Duplicate the main layer, then go to Filter > Other > High Pass and click Ok without adjusting anything.
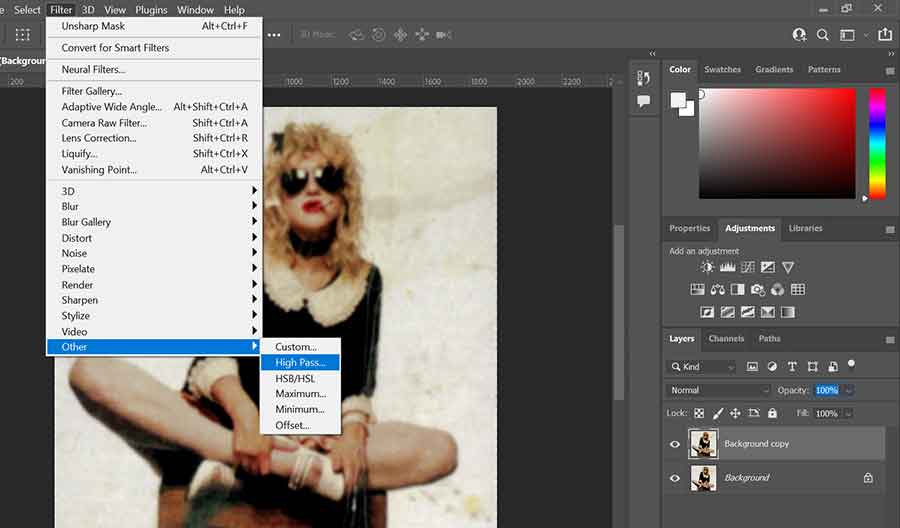
Then go to the Layers tab at the right side and select Soft Light from the dropdown options.
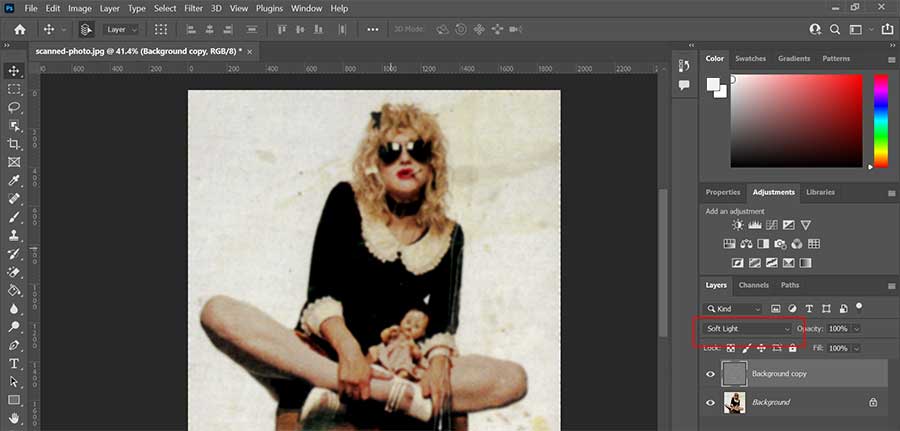
That’s it! You may repeat these steps and adjust according to your need.

